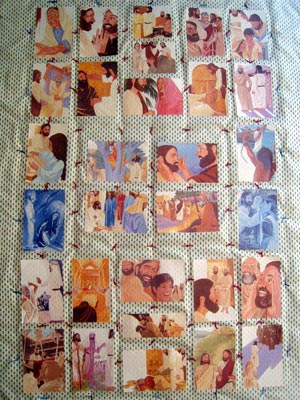
The Comforter (Sunday School Bulletin Board)
Categories: Sunday School Bulletin Boards
Click the bulletin board picture to see a larger version

Illustrations by Genevieve Meek, from Jesus' Healings Parts 1-3, 2002.

The Comforter
The idea of "The Comforter" came to me one day as I pictured a quilt on a bulletin board. I envisioned an interactive board: The quilt would consist of pictures of Jesus' 30 recorded healings, and the viewer would match each picture with the name of a healing on a list provided for each viewer.
What would be the title of the board? At first I liked the idea of "Quilt Quiz," but while looking up "quilt" in a thesaurus, I found an even better word - "Comforter" - which was more biblical.
Putting the quilt together involves multiple steps, but none of them is difficult. Give yourself plenty of time, and then have fun designing your "Comforter" Quilt. The steps listed below are easily adaptable.
Step 1
Measure the available wall space.
Step 2
Using a string, outline a diagram of the wall space on the floor. Be sure to include space on the board for the quilt, the title, and a large envelope to hold the lists of healings.
Step 3
Find 30 different pictures. Look for pictures of Jesus' healings in children's bibles, or other Sunday school resources—or better yet have the children draw their own pictures of the healings and put them on the quilt. Stick figures will work!
Step 4
Choose one picture for each healing, figure out the appropriate size for each picture, and print them out. I used the thinnest paper I could find. (In my experience, a computer and a printer are two of the necessary tools for making bulletin boards.)
Step 5
Arrange the pictures inside the string diagram on the floor as you would like them to appear on the bulletin board, and decide what colors would work best for the background of the quilt.
Step 6
Shop for quilt fabric. I prefer cotton. Bring the quilt measurements and pictures with you. Choose fabric that would compliment the pictures and, at the same time, not fight for focus. Purchase enough fabric for both sides of the quilt (the picture side and the backside) plus separate strips for the title across the top.
Step 7
Purchase quilt batting to provide padding and warmth.
Step 8
Wash the fabric to prevent shrinkage.
Step 9
Iron the fabric and cut it to size.
Step 10
Lay the pictures on the top of the quilt in a nice design, marking with pencil each of the corners. Take a digital picture to work from until the quilt is finished.
Step 11
Although I would have preferred to iron on the pictures, I glued them on the top of the quilt to save money. (The spray glue is available at hardware stores - 3M Super 77 Multipurpose Adhesive. It is handy for all bulletin boards. Another indispensable item is a "glue box" - an old cardboard box. Mine measures 17" long x 13" wide x 14" deep with a top that folds closed.) It is advised that this procedure be done outdoors or in the garage. To begin, line the bottom of the glue box with newspaper, and place 2 of the pictures face down in the bottom. The idea is to shake the glue can, and spray the backs of the pictures, but not forcefully or they will blow around. Most importantly, close the box immediately to contain the overspray and the odor. Change the newspaper after each spray. If you prefer to iron on your pictures, investigate the special iron-on paper and perhaps find others to help finance this step of the process.
Step 12
Pin the three pieces together – top fabric (now with pictures), batting and bottom fabric.
Step 13
Find yarn to match the quilt, measure evenly where to place your ties, and begin to sew them in a simple design that will hold the quilt together.
Step 14
Measure the border, buy fabric that matches the rest of the quilt, and with a sewing machine sew the edging onto the quilt. I had a quilter friend do this step for me.
Step 15
Make the title of the board. I made a strip of quilted fabric to match the quilt. Using a special machine called a Cricut (pronounced cricket), I cut out letters and glued them onto the fabric. Precut letters can also be purchased. An option is to print the title on paper to match the quilt using an appropriate font. The title can be backed by construction paper or poster board. This can be accomplished nicely using a paper cutter - another tool I find indispensable in making bulletin boards.
Step 16
Make a page with one half containing a numbered list of the 30 healings and where they are found in the Bible, and the other half displaying 30 blank boxes representing where the pictures are placed on the quilt. To answer the quiz, the viewer places a number in each box.
Step 17
Create a way to hang a folder or envelope containing the lists of healings on the board or place them in a basket or box nearby. I call this part of the board the "Quilt Quiz." Since it's heavy, you might buy larger-than-normal tacks. Place a few pencils with the quiz.
Olene Carroll |


